Showing posts with label Machining. Show all posts

Thursday, 21 April 2016

Frame Building

And so it all starts again . . . 


The new jigs are working a treat. We can't wait to see the difference in weight and looks of the frame when it's built with the new smaller diameter tubing.

There are three frames lined up for production. If you want one, drop us an email.

Saturday, 20 June 2015

SV650 - More Machining


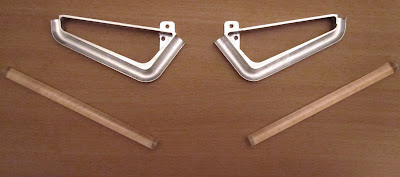
These parts have recently been machined to add to the collection of machined swingarm bits that are ready to go. These four pieces get welded into the end of the main tubes and are bolted onto the aluminium wheel mounting blocks at the rear.


We are now awaiting the arrival of the remaining couple of CNC aluminium parts which were outsourced, then we get to see if the parts all fit together as the CAD model suggests.

Sunday, 23 December 2012

SV650 - Finer Details


One of the very first renderings shows some very discreet daylight running lights and it has been the intention from very early on to follow that on and incorporate on the bike. I'm no lighting expert, so have had to seek some advice (cheers Si!) but have experimented with various ideas to get to this point.


Following on from a simple solidworks model, it was time to CNC machine the aluminium light guide mounts from a solid billet. These will mount to the subframe and sit beside the main projector light.

All that needs to be done to these is to make up a mounting bracket and polish the light guide profile in order to reflect as much light as possible.


Next up, was to form a piece of acrylic rod to sit in the profile (a quick blast in the oven helped soften it) with some recesses machined in each end to recieve the LED's, which are currently wired into the loom on the bike, illuminating my test lights.

Below you can see the desired effect working with a low powered LED (I needed a semi lit room to prevent glare on the camera). The final light guide will be illuminated from either end with a polished back, so will emit plently of light and like rather funky sat in front of the air inlet ducts. Can't wait to see it on the bike!

Monday, 20 February 2012

SV650 - The Dry Build Commences


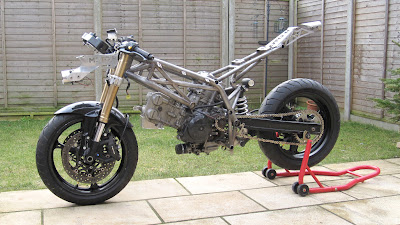
Here it is! We have started to do a dry build of all the parts manufactured so far to ensure they all fit when it comes round to put a running engine into the bike. 

The frame was always going to fit, but the front and rear subframes have been designed in CAD, so we need to have them on the bike to ensure everything aligns and the bodywork fits as it should. It also gives us chance to check all the brackets on the frame, fit the battery box, get the radiator mounts in place, locate the fuel tank . . . the list goes on.

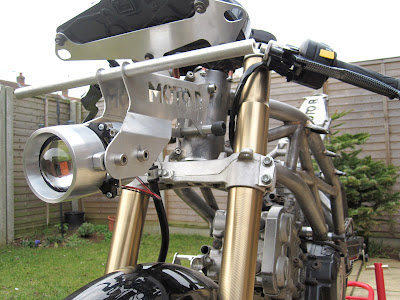
Below you can see how the front subframe fits with the instrument panel and adjustable headlight unit. Theres still a few more pieces to TIG weld on to fully support the front fairing. The lock-stops have also been integrated into the aluminum piece


The comparison below gives you an idea of how the frame has evolved from initial mock-up, through the CAD process and into a prototype frame. Main differences are larger radius' bends in the tubes, removal of a few bosses deemed unnecessary, addition of headstock gussets & side stand bracket sand obviously a higher grade material that has been fully TIG welded.


More photos as and when progress happens!

Friday, 10 February 2012

SV650 - Chassis No.1


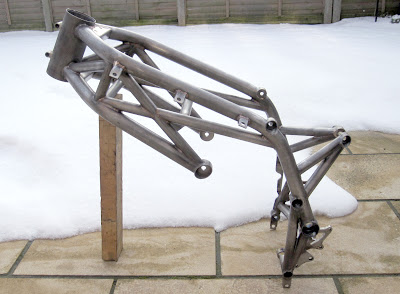
It's a big day today with the completion of the first frame. Simon and Stuart (the welders) have done a great job with the TIG welding over the past few weeks to get it to this stage and we can finally see the realisation of the CAD model.

All in it takes 63 components to build this, with most tubular joints seeing a 360 degree weld, so its taken a few hours to weld in the jig and then on the workbench.


Now that we have reached this stage, many other pieces should start to fit in place as the delay in having the frame finished has created a bit of a backlog. 

It's time to get building a bike!

Thursday, 2 February 2012

Phils Folding Bike


 This is a project that I assisted a former university colleague on at the end of last year and he has just sent over some photos of the final result.


Phil wanted to convert a standard road bike frame into a folding bike and designed some very simple and elegant hinges and break points. After a few discussions and refinements to the design, we ended up with the mechanical joints that you see below.


 The two hinges fit on the top tube and lock in place. One of these hinges has an element of rotation in order to allow the bike to fold out of alignment to prevent the wheels folding into each other.

 
This is the breaking point. Both pieces lock together then the outer knurled stainless steel sleeve screws them both together. (There was some clever machining to get everything to fit perfectly and the threads to align perfectly on this).


Sunday, 8 January 2012

SV650 - Rear Subframe Jig


 The first glimpse of how the rear subframe will look, sat in the jig ready to be TIG welded.

Welding also commenced on the main frame today and is coming along nicely.


Thursday, 5 January 2012

SV650 - Tubes, Bosses & Fixtures


What goes into a frame? 

Well, these are all of the parts that go into making our frame. I've gradually been machining, cutting, bending, notching and welding these parts from the CAD model for the past few months and have now reached a stage where they are all sat in the jig awaiting welding.


Tube bending has been problematic to say the least, but with time, swearing and many failed attempts destined for the scrap bin, I've managed to master the art (and our bender).


A tubular steel trellis frames needs triangulation for strength! Below is the headstock assembly which has to be welded on a separate jig before going into the frame jig, as it requires some machining with the bosses in place.

Like I said, the frame is all setup in the jig and should be welded within the next week. Check back for photos then!

Wednesday, 23 November 2011

CAD + Lasercutting = Funky new parts


 All those hours modeling parts and creating drawings in CAD and finally the real parts arrive!

We had a fairly big delivery of lasercut pieces arrive from Optima Stainless at the end of last week. This consisted of frame gussets, subframes, battery box, fuel tank pieces and some templates and jigs, which is handy, as we were waiting on these to make progress.

 
The few pieces shown include the end piece of the rear subframe (flat pack form of the CAD model shown in a previous post) at the top, the entirety of the front aluminium subframe above, with instrument panel support and headlight ballast pack in place and the new battery box below (I had to bend something!).


There will be more photos coming shortly when the parts get bent into shape.


Thursday, 17 November 2011

First Photos of the Dan-Tec 8-23 SC - Supplying The Power For The World’s Fastest Motorbike


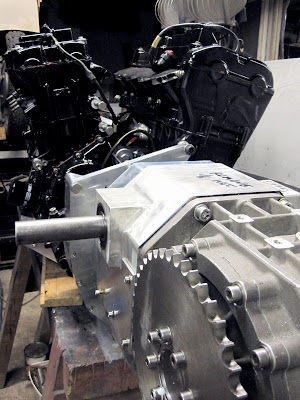
Here are the very first photos of the engine and drivetrain that will be powering the Angelic Bulldog motorcycle streamliner. With the finishing touches being performed by Dan Dole at the Footman James Classic Bike Show and arrival of the freshly machined bellhousing and rear engine covers, the specially made Elite gearbox was attached for the very first time.

So here it is, the offset square 8 configuration, originally based on two Honda Blackbird engines, feature counter-rotating crankshafts which link up to Elite gearbox via a specially made shaft traveling through the heart of the engine. All this is mounted onto a special baseplate to which will sit within the chassis. Its great to see at this stage, having been on the drawing board for over 18 months. The final assembly is huge and mightily impressive!

Theres some more photos below, and for any more info on the details of the engine, check out www.angelicbulldog.org.uk


Tuesday, 15 November 2011

SV650 - We've got lights


 The rear light unit arrived a few days back and we wanted to see how the final thing was going to look, so spent some time machining the aluminum housings from the CAD data and were so excited, we just had to put it up here!


 The front bi-xenon projector has a specially machined aluminium housing that screws together. Both halves are then externally connected which acts as the support and allows for the light angle adjustment. The projector mounting plate is quite large, so we've had to machine out some sections of the rear half to get the unit as compact as possible.


 The rear light is very similar in styling and also made in two halves which screw together, locking the LED light unit in place. This bolts directly in the rear subframe, sitting within the top of the tail piece so is a real feature of the back end.

Looking forward to the day that we can light them up on the bike!
Now wheres my electrical engineer . . .


Thursday, 27 October 2011

SV650 - Rearsets


Whilst we are waiting for some lasercutting and material to arrive to make the frame, we spent some time designing some rearsets to fit to the bike when its complete.


They have a 5-way range of adjustment, feature Needle roller bearings, knurled footpegs, anodised matt black etc. More details will be put up when they have been manufactured. Its likely that we will have to have a small quantity made, so if you are interested in some then let us know via email as they are designed to fit a standard curvy SV as well.


Tuesday, 27 September 2011

Dan-Tec Engine Cover

We have some photos of the latest piece of Angelic Bulldog streamliner to come off the milling machine. This piece acts as a cover on the front of the Dan-Tec offset square-8 engine and bolts to the left-hand Blackbird crankcase. 


I believe this is the final piece for the engine to be machined, so we'll hand it over to Dan next weekend and will hopefully see a fully built engine very soon!


Its quite a substantial piece of aluminum, good job weight is not really an issue for us!

Sunday, 23 January 2011

Blackbird Crankcases - Machining Log

 As promised many months ago, a bunch of images showing how the Honda Blackbird crankcases were machined. Two crankcases were machined this time round, allowing Dan to create one of the Dan-tec Square-8 engines he has designed. These images were taken as reference for when the time comes to machine another pair for the spare engine as it was quite a task to get positioned correctly on the milling machine to make multiple cuts without having to reposition. Below is how it went . . .


First cut to clean up the rough edges from when the gearbox was cut off on the bandsaw. Took the surface down roughly to within a few millimeters.

Took the material down to the required depth using a fly cutter, giving a more accurate and cleaner finish.


With the milling machine rotated through 90 degrees, the same process can be applied to the adjacent surface, a rough cut to remove the majority of the material before using a fly cutter.


As you can see here, we were at the very limit of the machines capability of handling the crankcase whilst having clearance in all planes to move the cutter.


Machining away part of the crankcase which needs clearance for one of the main shafts traveling between each crankcase half. This also highlights more problems we had with the machine size, as the cutter had to be operated at an angle to give it clearance to move up and down and not hit the crankcase.


Showing the final cut with clearance.


At this time, to perform the final cut, which was a radius between the 90 degree surfaces, the crankcases had to re-positioned and a cutter on a long shaft used.

Heres the final radius between both surfaces.

Whilst all this was going on, the aluminium base plate had been machined at Bosal and was delivered, ready for the freshly machined crankcases to be bolted on.